
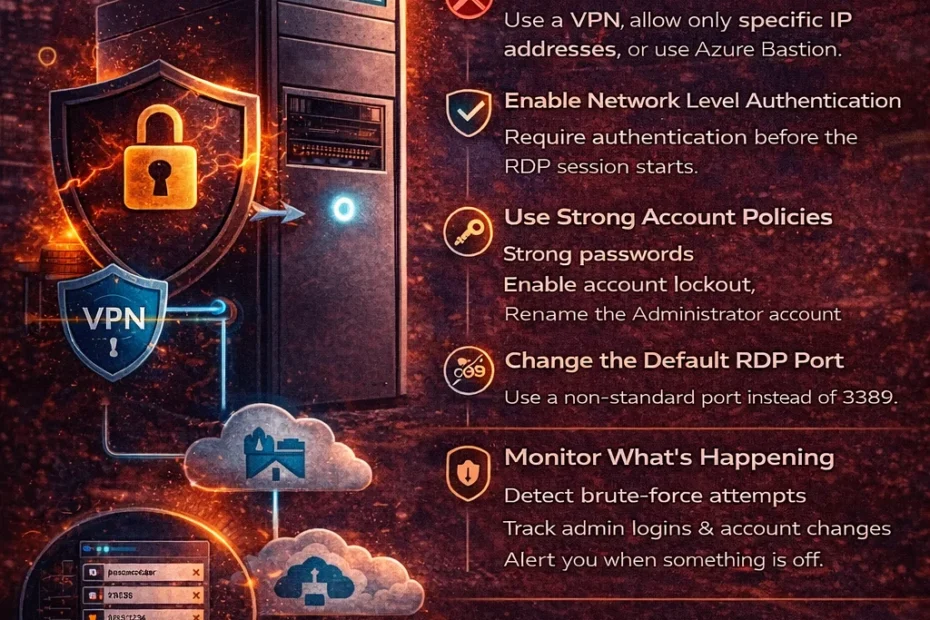
Remote Desktop (RDP) is how most small offices reach their Windows server, and it is one of the services attackers abuse most: in the incidents Sophos’s response team handled in 2023, RDP was misused in 90% of cases (Sophos, 2024). Leaving it open is a big risk, and if you restrict RDP access carelessly you can cut yourself off from your own server. This guide walks through each step safely, with a way to check it before you rely on it.
Before You Start: Don’t Lock Yourself Out
Every step below changes who can reach your server. Before you touch anything, make sure you have a second way in if a rule goes wrong:
- Physical or console access. For an office server, that is the keyboard and screen in the server room. For a cloud VM, it is the provider’s console: Azure Serial Console, AWS EC2 Serial Console, or your VPS host’s VNC view. Confirm you can sign in through it now, not after you are locked out.
- Keep your current session open. When you apply a firewall change, do not disconnect. Open a second RDP session to test. If the new rule blocks you, your existing session still works and you can undo it.
Step 1: Decide Who Actually Needs RDP
Most servers collect remote access permissions over time: an article assistant who left last year, an employee who changed roles, an IT vendor who finished the project. Every one of those accounts is a way in.
Open Computer Management > Local Users and Groups > Groups > Remote Desktop Users and look at the list. Remove everyone who does not need remote access today. Members of the Administrators group can always use RDP regardless of this list, so check that group too. Fewer admin accounts means fewer accounts worth attacking.
Step 2: Never Expose RDP Directly to the Internet
This is the most important step. If the RDP port is reachable from anywhere, automated scanners will find it: Sophos’s 2019 honeypots received their first attempt within 84 seconds of going online (Sophos, 2019). From then on you will see brute-force attempts in your Security event log every day.
Check whether you are exposed right now. From a laptop outside your network (connected to a mobile hotspot), run:
Test-NetConnection your-office-public-ip -Port 3389If TcpTestSucceeded comes back True, anyone on the internet can reach your sign-in screen. In most offices that is because the ISP router forwards the port to the server, so check the router’s port-forwarding page too: a vendor may have forwarded a different outside port to 3389. What to do instead:
- Use Prixl Guard Secure Access. Each staff member connects to the office server through an encrypted WireGuard tunnel, then opens Remote Desktop as usual. You invite people from the Secure Access tab of the Warden dashboard, and once they are connected, “Lock RDP to Secure Access only” closes Remote Desktop to the internet while the office LAN keeps working. Its default connection method needs no router setup and no static IP, which suits Indian broadband where the office IP changes or sits behind CGNAT. The staff app is for 64-bit Windows only.
- Use a VPN or Remote Desktop Gateway. Connect to your network first, then use RDP through the tunnel, so RDP never touches the public internet. RD Gateway wraps RDP in HTTPS on port 443 and supports multi-factor authentication, but takes more setup.
- Use cloud-native remote access if your server is in the cloud: Azure Bastion, AWS Systems Manager Session Manager, or your provider’s equivalent. These give you a session with no open inbound port.
- If none of these is possible yet, restrict by source IP. That is Step 3.
Step 3: Restrict RDP to Known IP Addresses
Windows Firewall can limit RDP to specific source addresses, so only your office and your admin’s home connection can even attempt a sign-in. In PowerShell (run as Administrator):
Set-NetFirewallRule -DisplayGroup "Remote Desktop" -RemoteAddress LocalSubnet, 203.0.113.10, 198.51.100.25LocalSubnet keeps Remote Desktop working for staff on the office network; leave it out and they are locked out too. Replace the example addresses with your real static IPs, separated by commas. The same change in the GUI: Windows Defender Firewall with Advanced Security > Inbound Rules > Remote Desktop – User Mode (TCP-In) > Properties > Scope > Remote IP address, then choose “These IP addresses”, add “Local subnet” (under Predefined set of computers) and your allowed addresses. Do the same for the UDP-In rule.
If you moved RDP to a custom port with your own firewall rule (as in our port change guide), the command above does not touch that rule, because it is not in the “Remote Desktop” group. Scope it by name as well:
Set-NetFirewallRule -DisplayName "RDP Custom Port" -RemoteAddress LocalSubnet, 203.0.113.10, 198.51.100.25If you also created the “RDP Custom Port UDP” rule, run the same command with that name.
Two things to know before you rely on this:
- It only works with static IPs. Most home broadband connections get a new address from time to time, and then that person is blocked. If staff work from home, Guard or a VPN is the better answer.
- Cloud servers should also restrict at the cloud layer. Set the same source-IP restriction in your Azure Network Security Group or AWS Security Group. Two layers means one mistake does not expose you.
Step 4: Enable Network Level Authentication (NLA)
NLA requires users to authenticate before the RDP session is created. Without it, the server starts a full session and shows its sign-in screen to anyone who connects, which uses resources for every anonymous connection and exposes code that runs before sign-in. That is how BlueKeep (CVE-2019-0708) worked, and CISA listed NLA as a mitigation for it (CISA, 2019). NLA does not stop password guessing; it just moves it to an earlier stage.
To enable: run SystemPropertiesRemote.exe and tick “Allow connections only from computers running Remote Desktop with Network Level Authentication (recommended)”. Or in PowerShell:
Set-ItemProperty -Path 'HKLM:\SYSTEM\CurrentControlSet\Control\Terminal Server\WinStations\RDP-Tcp' -Name UserAuthentication -Value 1NLA arrived with Remote Desktop 6.0 in Windows Vista and Server 2008, and even Windows XP SP3 clients can be set up to use it, so any computer your staff use today can connect with it switched on.
Step 5: Harden the Accounts That Can Sign In
Restricting the network path is half the job. The other half is making the accounts behind it hard to guess:
- Require long passwords. We recommend a minimum of 15 characters, in line with NIST SP 800-63B-4 (2025), set through Group Policy so it applies to everyone. Passphrases are fine; forced symbol mixes are not needed. Windows’ “Minimum password length” setting stops at 14 unless “Relax minimum password length limits” is enabled, which is available on Server 2022 and later.
- Enable account lockout, and know its gaps. Microsoft’s newer default is 10 failed attempts, a 10-minute lockout and a 10-minute reset (KB5020282; Windows 11 22H2 and newer builds). On Server 2022 and older, the built-in Administrator is exempt from lockout unless “Allow Administrator account lockout” is enabled, so attackers can keep guessing that account forever. And on a server still open to the internet, lockout lets an attacker lock your staff out. Details in our account lockout guide.
- Rename or disable the built-in Administrator account. Attackers try “Administrator” first in nearly every campaign. Create a named admin account for each person who needs one, then rename or disable the built-in account so guesses against it go nowhere.
Step 6: Consider Changing the Default Port
Changing RDP from port 3389 to something else reduces log noise. It is not security: some scanners check every port, and a Malwarebytes honeypot on a non-standard port still got about 10,000 guesses a day (Malwarebytes, 2022). If you do it, pick a port below 49152 (49152 to 65535 is Windows’ dynamic range for outgoing connections), update the router’s port-forward, and scope the new firewall rule as in Step 3. Treat it as an optional extra after Steps 2 to 5, never instead of them.
Step 7: If You Don’t Use RDP, Turn It Off
The safest RDP configuration is no RDP at all. If this server is managed at the console or through other tools, disable Remote Desktop entirely:
Set-ItemProperty -Path 'HKLM:\SYSTEM\CurrentControlSet\Control\Terminal Server' -Name fDenyTSConnections -Value 1
Disable-NetFirewallRule -DisplayGroup "Remote Desktop"
Run this from the console, not over RDP: it ends remote access to the server.
Step 8: Verify Everything Actually Worked
Do not assume; test. Three checks, in order:
- From an allowed path (the office LAN, Guard or your VPN, or an allowed IP): connect over RDP normally. It should work exactly as before.
- From a blocked network (mobile hotspot): run the
Test-NetConnectioncheck from Step 2 again. It should now fail or time out. - In the Security event log: the number of failed sign-ins (Event ID 4625) from outside addresses should drop sharply within a day or two of closing public access. If failures keep pouring in, something is still exposed.
Common Pitfalls to Avoid
Four mistakes come up again and again when offices restrict RDP:
- Allow-listing a dynamic IP. Your admin’s home broadband address changes and suddenly nobody can get in. Only allow-list addresses you know are static.
- Fixing Windows Firewall but forgetting the router or cloud layer. If the router still forwards an outside port to the server, or your Azure NSG or AWS Security Group still allows 3389 from anywhere, scanners still reach the server and your Windows rule is the only thing standing. Fix both layers.
- Permanent access for temporary needs. A vendor needs RDP for a one-week project and the firewall exception is still there two years later. Put an expiry date in the calendar the moment you grant outside access, and remove the rule when the work ends.
- Treating the port change as the fix. Moving RDP to port 38389 quiets the logs, which feels like progress, but the door is just as open to anyone who scans for it.
The Safety Net: Monitor What Gets Through
Even with all of the above, you need to know what is happening on your server. Firewall rules get loosened during troubleshooting and never restored. VPN passwords get phished. Slow, patient attacks stay under the lockout limit. Restricting access shrinks what can be attacked; it cannot tell you when something slipped through. That takes watching the event log for attack patterns, which is the part nobody has time to do by hand.
Prixl Warden runs as a service on the server and watches the Windows event logs for:
- Failed sign-ins and brute-force patterns, per IP and per account: both fast floods and slow, low-and-slow campaigns
- Successful sign-ins outside working hours
- Admin sign-ins
- New accounts, admin-group changes, account changes and lockouts
- The firewall being turned off or its rules changed
Restricting access reduces your attack surface; monitoring tells you when something gets through anyway. Both belong in a sound RDP security setup. Start your 30-day free trial to add the monitoring layer, and see Guard when you are ready to close RDP to the internet.